DIV and Backend again. A TypeScript Tale: Part 2 - Type-GraphQL
DIV and Backend again. A TypeScript Tale: Part 2 - Type-GraphQL
Adding Type-GraphQL

As awesome as Nx.dev is, it can’t write your whole app. You need people of intelligence on this sort of… mission… quest… thing!
Well, that rules you out JQuery.
...Too far?Type-GraphQL will generate your graphql schema based on your back end classes. It can keep us from having to go to deep into the woods with Graphql schemas, resolvers, etc... May it be a light to you in dark places, when all other lights go out.
nx.dev- In part 1, we setup an Nx workspace, with a NextJS front end.
YOU ARE HERE
Type-GraphQL - A graphql schema generator/framework which uses your types (from TypeORM) to produce your graphql schema.TypeORM - An excellent, battle tested, ORM with over 20k stars. TypeORM will be where the bulk of our actual types flow from. TypeORM can generate and run migrations as well as traditional ORM capabilities.
GraphQL Code Generator - The type safe link between your front end and your back end. We will generate an SDK, which we can use on the front end to achieve complete type safety. We will use the apollo generator, but there are tons of options for common graphql tooling.
Tying it all together - Lets put all our hard work to good use with some examples.
Prerequisites
You should have the following installed:
node: version 14 or greater. I recommend NVM if you need to switch versions between projects.
yarn: You could use npm if you like, but this guide will be using yarn in it’s examples.
Docker: We use docker to setup a development database. You can always install postgres directly on your machine if you don’t want to use Docker. Just make sure postgres is running on port 5432.
Make sure you have read Part 1, because we are building on the foundations laid there.
Part 2: Adding Type-GraphQL
Want to skip ahead? Check out the the Part 2 source on GitHub
Adding our express app
The first thing we will need to do is, add some dependencies:
yarn add -D @nrwl/expressNext we create an express app:
yarn nx generate @nrwl/express:application apiYou can start the api by running:
➜ yarn nx serve api 
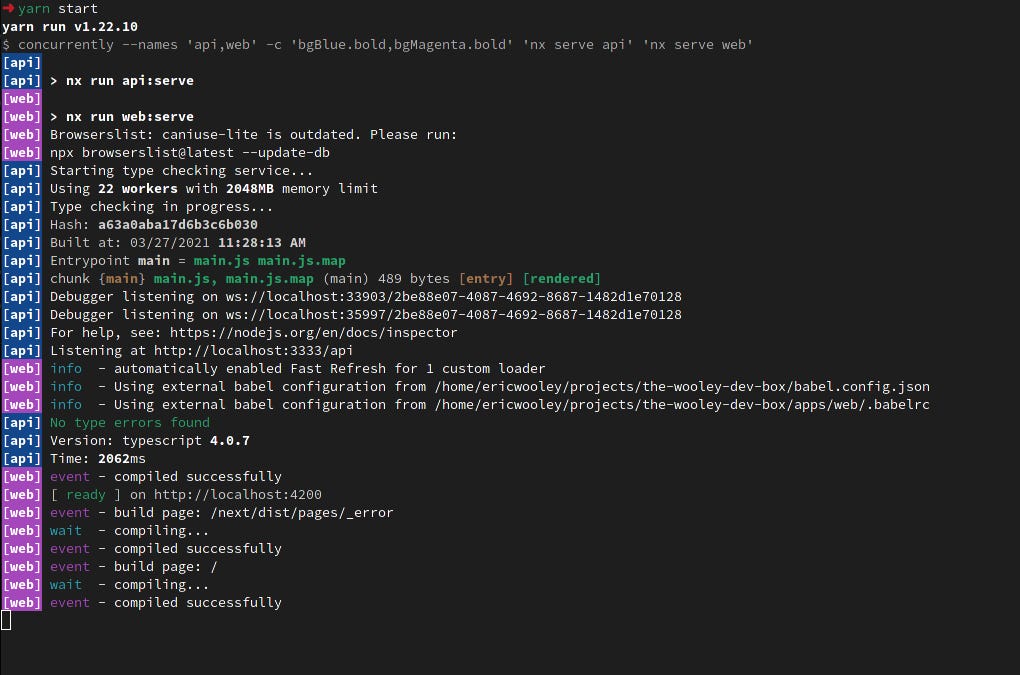
Lets update our start script in package.json, to run our api and web server at the same time. Nx allows you to run multiple commands at the same time, but the output is hard to read, so we will use concurrently.
yarn add -D concurrentlyThen switch the start command in package.json
- "start": "nx serve",
+ "start": "concurrently --names 'api,web' -c 'bgBlue.bold,bgMagenta.bold' 'nx serve api' 'nx serve web'",
If everything is done right, `yarn start` should look something like this:
Adding Apollo Server Express
Apollo Server is a graphql server, that is going to work well with the code that we eventually generate. Other graphql servers work as well, but I found that the types from the generated code were inconsistent with the server error responses. For more on Apollo server, see the official documentation.
First install the Apollo Server Express dependencies:
yarn add apollo-server-express graphql-tools graphqlLets replace the default express content. This is what Nx starts us out with:
apps/api/src/main.ts
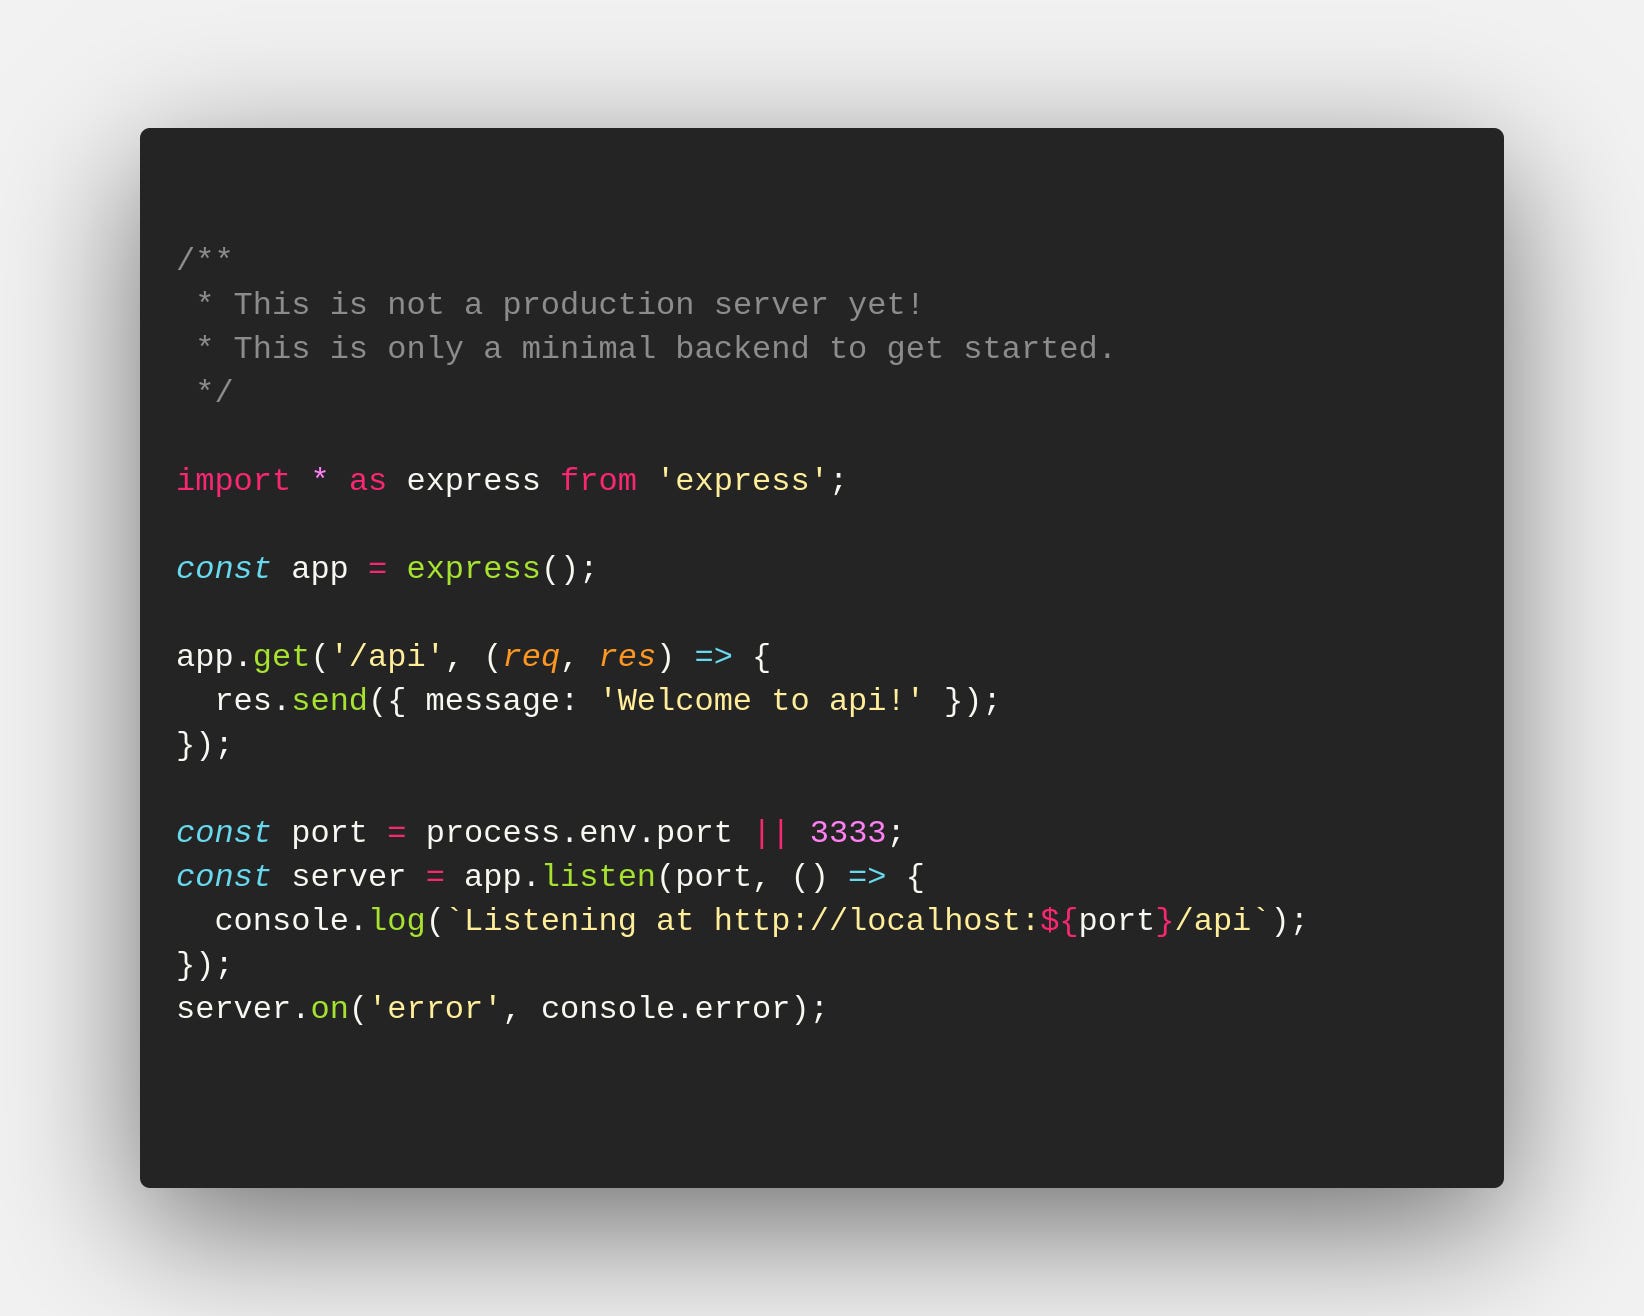
We need to modify this page to add apollo-server-express.

If everything is done correctly, we should be able to navigate too http://localhost:3333/graphql, where we are presented with a graphql GUI:

You should also be able to use the hello query.
Adding Type GraphQL
Type GraphQL is a great library which generates your graphql Schema based on Typescript classes, and resolves. For more advanced options, refer to Type-GraphQL install guide.
First, install the dependencies:
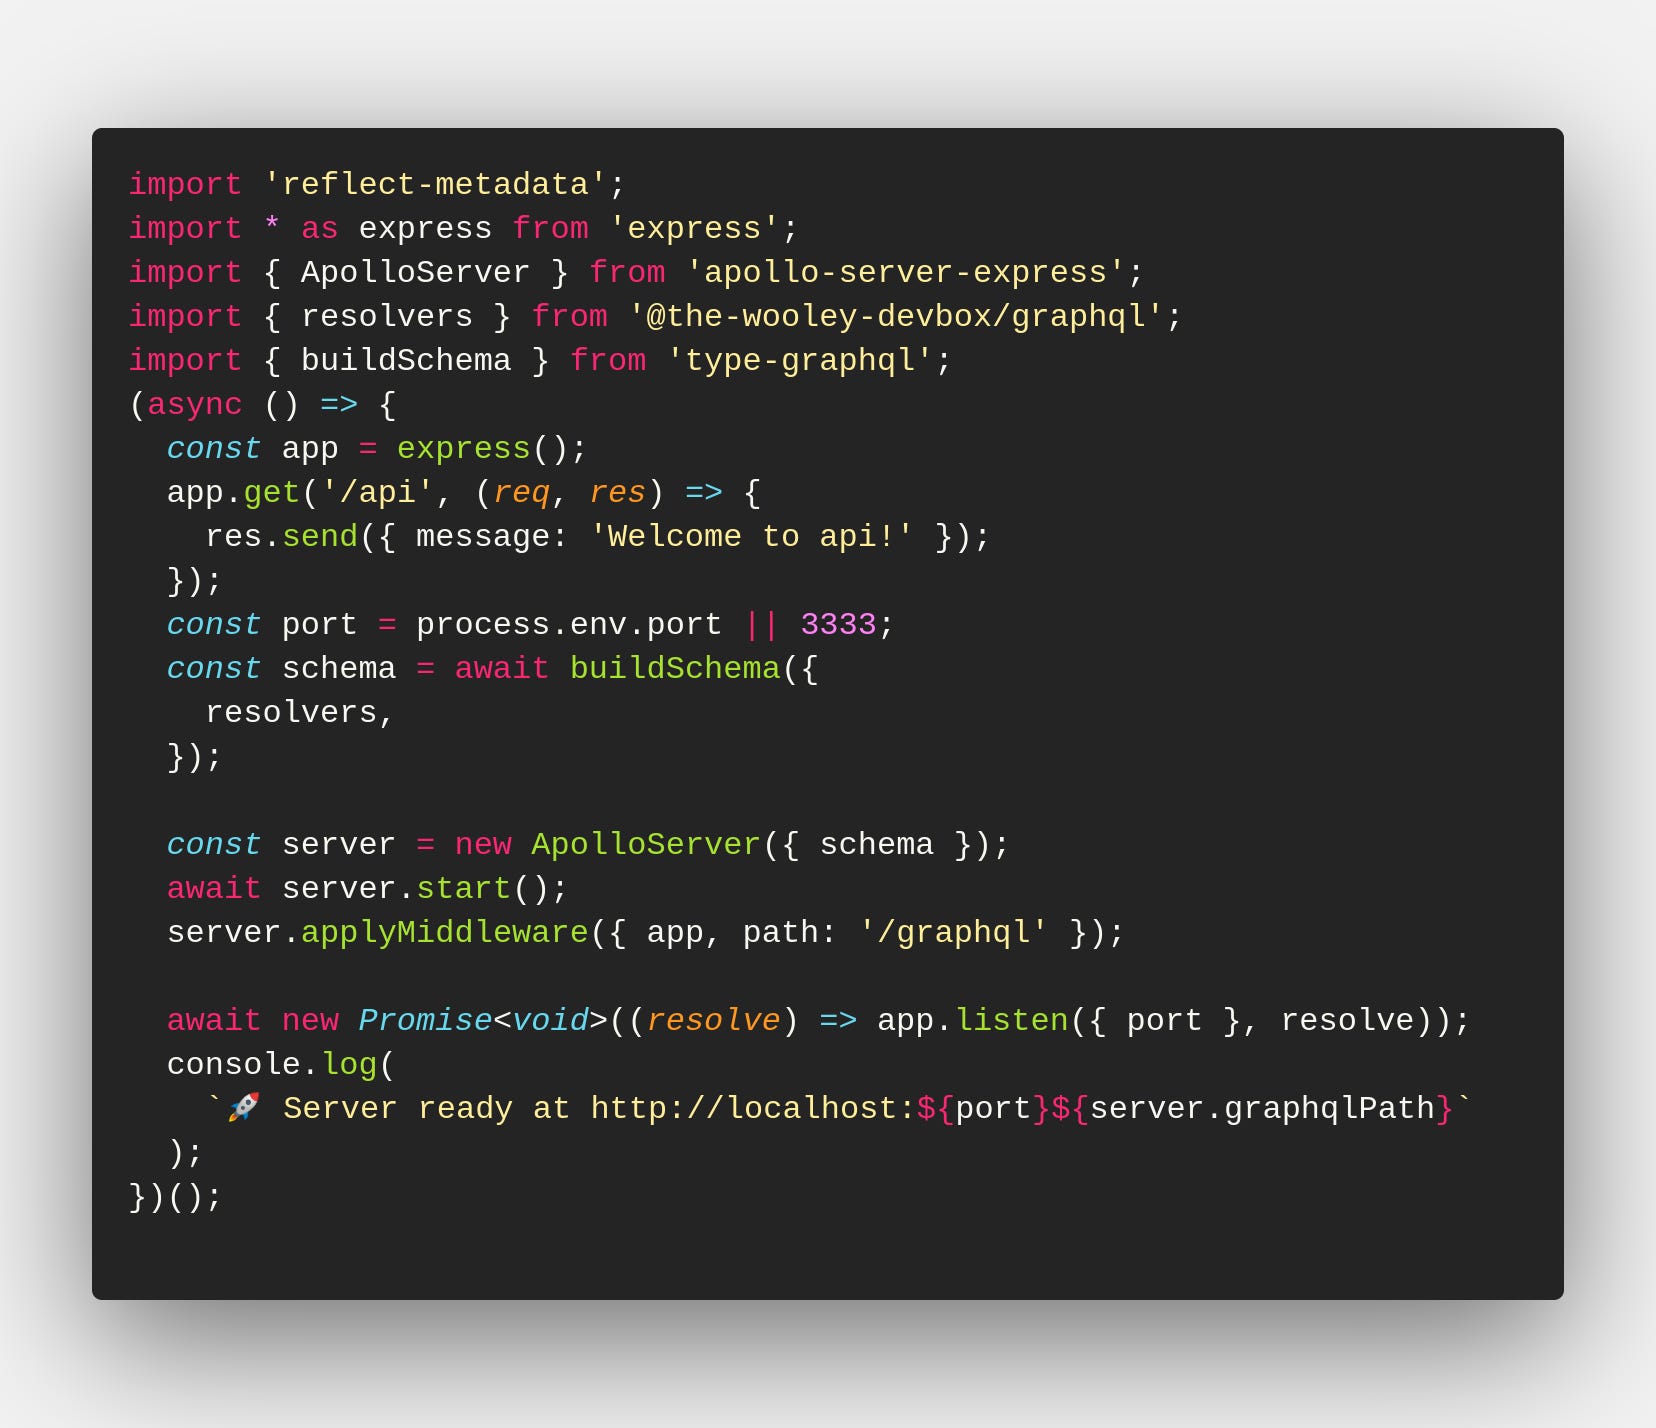
yarn add reflect-metadata class-validator type-graphqlFirst thing you need to do, is import reflect-metadata on line one of apps/api/src/main.ts
import 'reflect-metadata';
import * as express from 'express';
import { ApolloServer, gql } from 'apollo-server-express';(async () => {//…
Next we need to change the target in <root>/tsconfig.base.json to es2018, if you encounter any issues, see the installation instructions. Change the target and lib options.
//...
    "target": "es2018",
//...
    "lib": ["es2018", "dom"],
//...
Next we are going to generate our first lib, aptly named: graphql
yarn nx generate @nrwl/node:library --name=graphql
Nx creates a bunch of files for you. Your libs folder structure should look something like this:
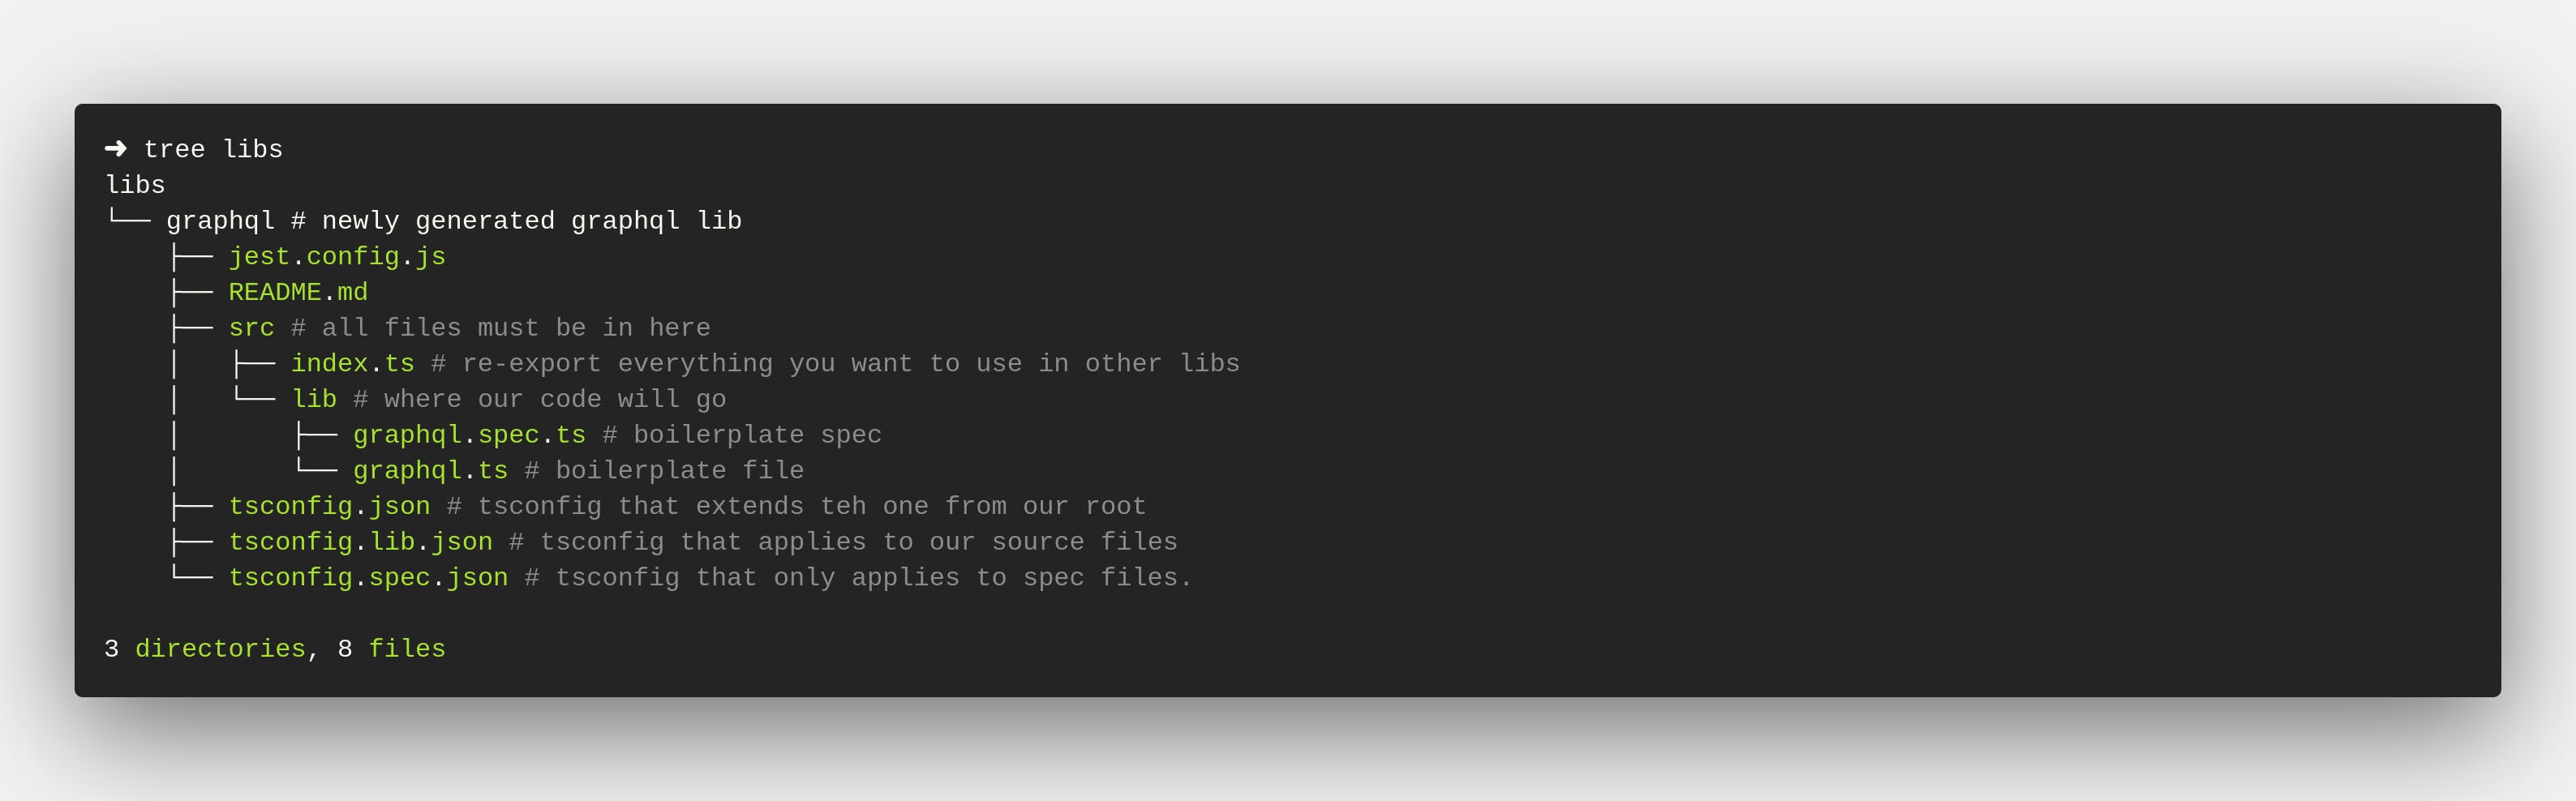
We can delete graphql.ts and graphql.spec.ts, because we won’t be needing them. Instead, lets create resolver file, and a list directory, and a list resolver file.
rm libs/graphql/src/lib/graphql.ts
rm libs/graphql/src/lib/graphql.spec.ts
touch libs/graphql/src/lib/resolvers.ts
mkdir libs/graphql/src/lib/list
touch libs/graphql/src/lib/list/list-resolver.ts
Lets create our first resolver in libs/graphql/src/lib/list/list-resolver.ts:
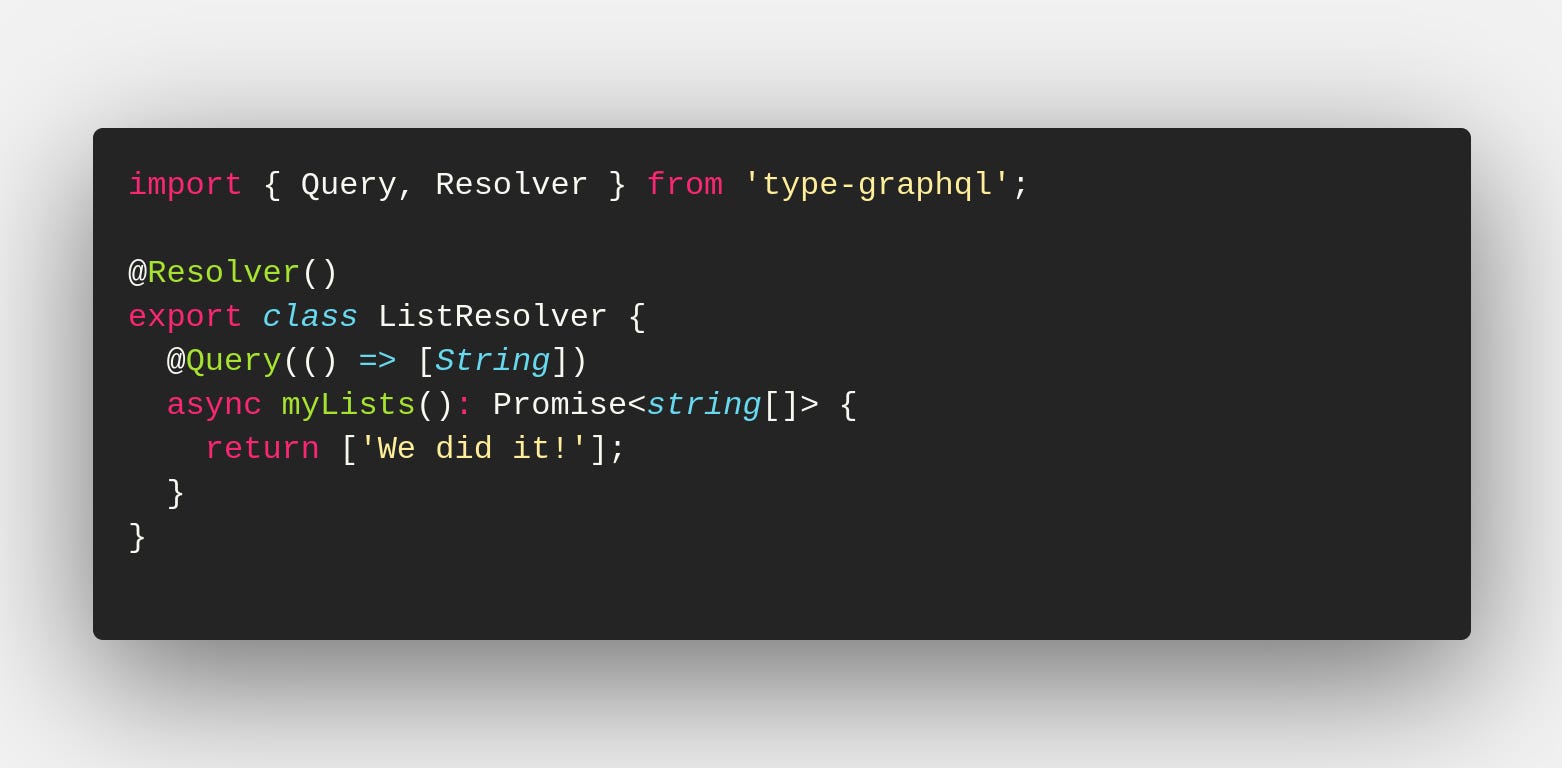
We have created a very simple graphql resolver. Lets break down how it works:
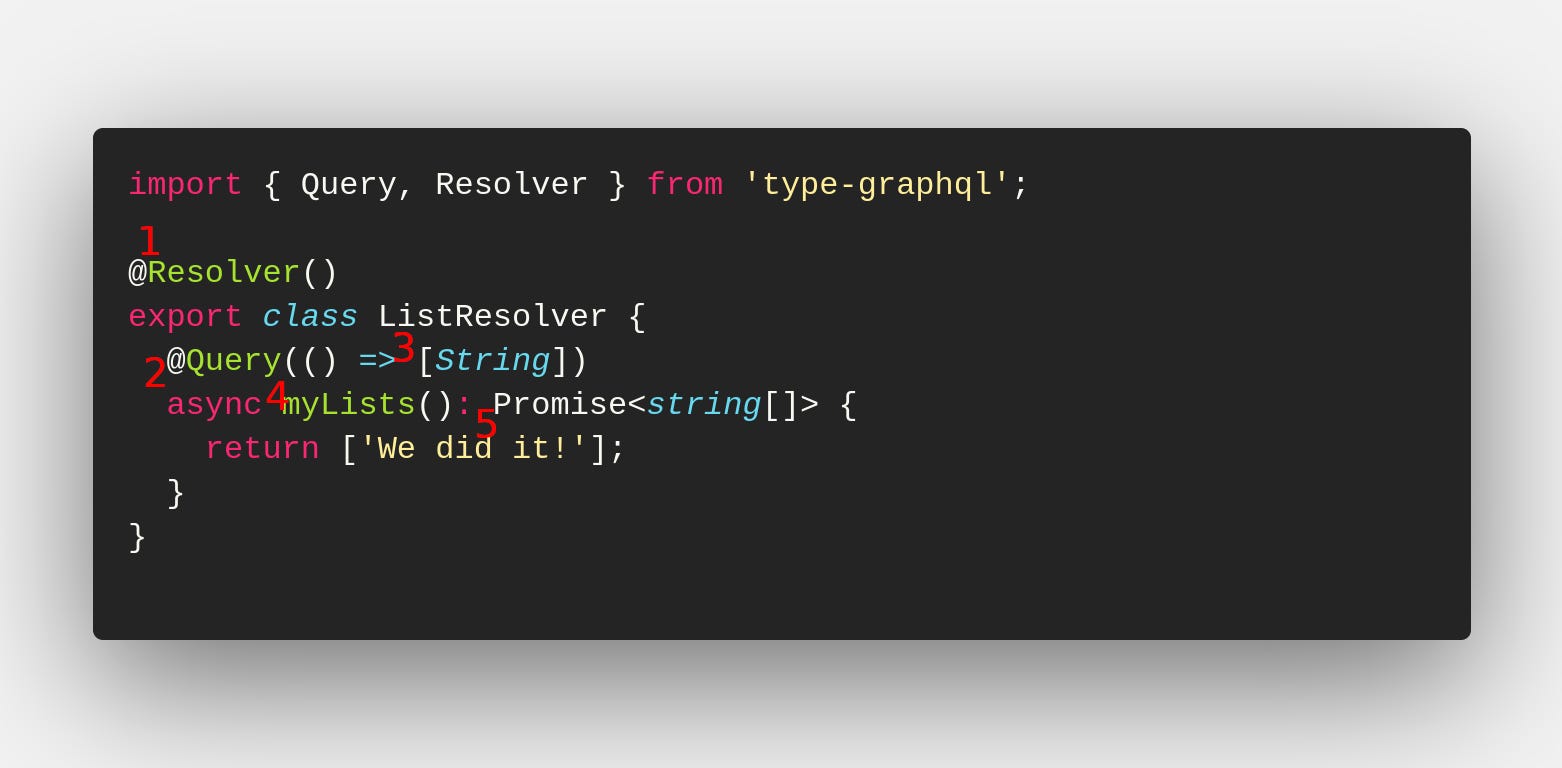
Type-GraphQL resolvers must have the @Resolver Decorator, or you will get an error
The @Query decorator tells Type-GraphQL that this method can be used to query in graphql.
The return type for graphql. Notice how is is not typescript types, it’s an actual array wrapping the String constructor. Type-GraphQL uses this to create the schema return type
The name of the query will be “myLists”, after the name of the method.
We have to manually return the type correct type, and it should line up with what we return in the @Query decorator.
Next we need to hook our resolvers up to our graphql server:
Edit
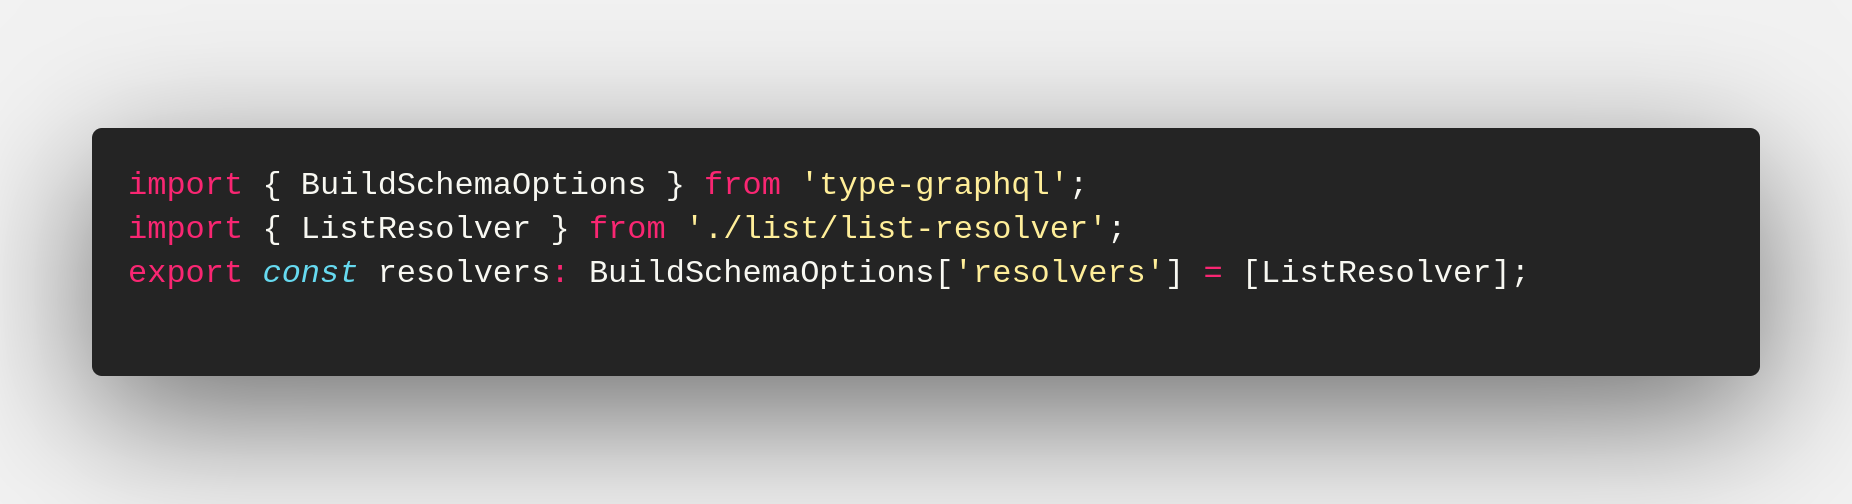
libs/graphql/src/lib/resolvers.tsto export an array of resolvers. The array should only contain the listResolver.Edit
libs/graphql/src/index.tsto export everything from resolvers.tsEdit
apps/api/src/main.tsto generate your schema based on your resolvers, using Type-GraphQLbuildSchemafunction. You can import your resolvers using `@<project-name>/graphql`. Nx set the alias up for us when we generated the project.Run
yarn start, and visit http://localhost:3333/graphql again, this time you should be able to query myLists:
Up Next
We have set our selves up with a NextJS front-end, a graphql back-end using Type-GraphQL. Next we will be hooking our graphql server up to our postgres database, with TypeORM.
If you haven’t subscribed, make sure you do, so you don’t miss the next part in the series.